Saturday, July 16, 2011

This Weeks Delish

This is officially my last post for a while. I am going on blog hiatus. This Monday the movers are coming to get all of our stuff including my friend, the computer. Now, I will be returning as soon as possible- don't fret! Unfortunately when moving overseas.... as soon as possible is likely in the realm of two months. Wish us luck in Germany! And until my return I hope you enjoy all the posts I've made over the last three months : )

Here are a couple I found from other blogs this week:

  • I haven't had an M&M cookie in forevvvver! These just looks so scrumptious and fun : D I love fun ideas.
  • Ughhh, I SO need to make this- I love spinach and mushrooms! Together in a slow cooker as a lasagna... tooooo good.
  • I've never had a fool before. They look so creamy and delicious. This blueberry fool looks so yummy!
  • I think the idea behind these oreo peanut butter layer pies is SO clever- how easy and incredibly delicious....
  • Alright, another one from picky palate.... this girl is amazing at coming up with insane combinations! Gooey cookies and cream chocolate cake bars anyone?
This Weeks Pick:


Absolutely these Chewy Brownies from Cooks Illustrated. I was really impressed with the recipe. I know, it's just a basic brownie.... but seriously, it's a really realllly good homemade brownie recipe! The texture is amazing and it is so easy to throw together. It's definitely one of my favorite brownie recipes.

Friday, July 15, 2011

Cooks Illustrated Best Blueberry Muffins


Before I started baking, my favorite thing to buy from the bakery was a blueberry muffin. Not because the bakery that I purchased them from had especially good muffins or anything. I just really like blueberry muffins. I don't know if you've noticed... I actually just really like blueberries haha.

Anyways, I don't know if you have ever tried making homemade blueberry muffins before.... but there are about a million different recipes out there. They can range from recipes using buttermilk, whole milk, sour cream, yogurt, butter, oil, etc. The list goes on in any combination of those ingredients. And most of them claim to be the best. Well, I won't tell you these are the best, but I will tell you that they were especially delicious. If you know me, you know that I don't like saying that certain recipes are the best. I just don't think it's right to make such a proclamation- who knows what else is out there in the unreached recipe world?


So, back to these muffins. They were realllllly good. And I will most definitely be making them again. They were moist and packed with flavor, something that is not always the case with muffins. Most blueberry muffins simply have blueberries stirred about the batter. These had a blueberry reduction that was swirled into the batter. THEN they were sprinkled with not just granulated sugar, but lemon sugar. Lemon zest was rubbed into granulated sugar to infuse the oils. Those are the kind of extra steps that put baked goods over the top. This one was successful. I will tell you, I was hesitant with the sugar because I felt like there was more than I could possibly spread across just 12 muffins. I ended up not using it all. Dumb. Don't be dumb like me. Use it all. Seriously, don't sprinkle and say good enough like I did. Take a good tablespoon or so and mound and spread it around the batter top. I realized afterward that it is the granulated sugar topping that creates that crisp, crunchy shell of a muffin top that is everybody's favorite. So since I didn't add all the sugar, I didn't get the full effect. Don't be hesitant like me, just go for it. I give you permission.

The other thing I did, which goes against all cardinal rules of baking, was overmix the batter a bit. UGH.  ALWAYS mix just until the batter comes together- then stop. Well, let me tell you why I over mixed it a little. The batter is really, really lumpy. It is human nature to want to get those lumps out.... so I gave the batter a few extra stirs and then I caught myself because the stirring wasn't loosening up the lumps so I was just making my dough tough (not tender) by over mixing... I am really upset about this. And at that point I still needed to stir in the berries (which I honestly had forgotten about ha) and swirl in the blueberry jam reduction. So not only had I already over mixed a bit, but I stil had to mix some more. They still came out beautifully and soft, but I am convinced they didn't reach the height of their greatness because of my OCD and those darn lumps. SOOOO basically, when you go to make this, stop mixing when there are still a few dry bits of flour and then add the blueberries. You'll be much better off.


Best Blueberry Muffins
adapted from Cooks Illustrated
Print Recipe

Lemon-Sugar Topping 
1/3 cup sugar
2-3 teaspoons finely grated zest from 1 lemon

Muffins 
2 cups (about 10 ounces) fresh blueberries, picked over
1 1/8 cups (8 ounces) plus 1 teaspoon sugar
2 1/2 cups (12½ ounces) unbleached all-purpose flour (if you have a scale weigh it, don't measure it - it's worth it)
2 1/2 teaspoons baking powder
1 teaspoon salt
2 large eggs
4 tablespoons (½ stick) unsalted butter, melted and cooled slightly
¼ cup vegetable oil
1 cup buttermilk*
1½ teaspoons vanilla extract
*If buttermilk is unavailable, substitute 3/4 cup plain whole-milk or low-fat yogurt thinned with 1/4 cup milk.

Bring 1 cup blueberries and 1 teaspoon sugar to simmer in small saucepan over medium heat. Cook, mashing berries with spoon (I used my potato masher) several times and stirring frequently, until berries have broken down and mixture is thickened and reduced to ¼ cup, about 6 minutes. Transfer to small bowl and cool to room temperature, 10 to 15 minutes.

Adjust oven rack to upper-middle position and heat oven to 425 degrees. Spray standard muffin tin with nonstick cooking spray.

For the topping- Stir together sugar and lemon zest in small bowl until combined; set aside. Whisk flour, baking powder, and salt together in large bowl. Whisk remaining 1 1/8 cups sugar and eggs together in medium bowl until combined, about 45 seconds. Slowly whisk in butter and oil until combined. Whisk in buttermilk and vanilla until combined. Using rubber spatula, fold egg mixture and remaining cup blueberries into flour mixture until just moistened. (Batter will be very lumpy with few spots of dry flour; do not over mix.)

Use ice cream scoop or large spoon to divide batter equally among prepared muffin cups (batter should completely fill cups and mound slightly). Spoon teaspoon of cooked berry mixture into center of each mound of batter. Using small spoon, gently swirl berry filling into batter. Sprinkle lemon sugar evenly over muffins.

Bake until muffin tops are golden and just firm, 15 to 19 minutes (don't over bake), rotating muffin tin from front to back halfway through baking time. Cool muffins in muffin tin for 5 minutes, then transfer to wire rack and cool 5 minutes before serving. Makes 12 muffins 

Thursday, July 14, 2011

Sweetened Cream Cheese Spread


Easy, simple recipes are the best. Especially when the outcome is terrific. That is how I feel about this cream cheese spread. It is THE most basic thing you could make... but it is sooooooo good!!! And you can do so much with it too!


I call this a spread and not a dip because the consistency is a little thick. If you wanted to make it into a dip for say, fruit, just add a little cream or half and half. Milk may do the trick, but it will lack in flavor and probably make it more water than anything else. 


Anyways, you can use this for lot's of stuff. I like it on cinnamon raisin bread- yummmm! But you could spread it on graham crackers or cookies or brownies... The list is endless. You could put it on plain toast or flavored bagels. You can even flavor the spread by adding cinnamon to it. Then it would really be a hit a plain toast! Imagine. This is just so good and so easy. Definitely a staple recipe. 


Sweetened Cream Cheese Spread
Print Recipe

4 oz cream cheese, softened
1/4 cup confectioners sugar
1/4 tsp vanilla extract

Blend all ingredients together in small bowl with spatula.

Wednesday, July 13, 2011

Ranch Dressing


Honestly, I don't really like salads. When I do have one though, I much prefer a cream dressing to an oil one. I know... not the healthier option, but that is just my preference. Ranch dressing is one of my family's favorites. We always bought it or made it from the packet though. I've never had homemade ranch until now.


It was simple to put together and easy to tailor to your own tastes. You could add extra spice with cayenne pepper or hot sauce. You could make it extra herby by adding more of your favorites. Or you could make it very plain. You also add buttermilk to meet your own desired consistency, which gives you the option of making it thicker for a veggie dip. It is a great option for all you ranch lovers out there!


Ranch Dressing
adapted from Pioneer Woman
Print Recipe

1 clove (to 2 cloves) garlic
salt to taste
1/4 cup chopped parsley
2 Tb fresh chives
1 cup mayonnaise
1/2 cup sour cream
buttermilk, as needed to desired consistency

optional add ins: vinegar, hot sauce, dill, paprika, oregano, etc.

Mince the garlic with a knife and then sprinkle about an 1/8 to ¼ teaspoons of salt on it and mash it into a paste with a fork. Chop the parsley, chives and any of the optional herbs very finely and add to the garlic.
In a bowl combine all ingredients, adding other optional ingredients as you wish, tasting frequently and adjusting seasonings as needed. Chill for a couple of hours before serving, thin with milk or buttermilk if desired.

Tuesday, July 12, 2011

Chewy Brownies


Here is yet another brownie recipe that I would like to share with you. If you haven't realized this yet... I love brownies. If I was going to pick a favorite dessert, I would have to say brownies. And that is seriously saying something since I love so many desserts oh SO much! But brownies or any type of brownie bar is a favorite of mine.

These brownies in particular are a new favorite. Oh goodness where to begin. Let's just start with the most obvious. They are chewy. Chewy in the good sense. Chewy in the sense that they are not dense like fudgy brownies or cake-like and soft like other brownies. They have the perfect bite to them. I like them when they have cooled for a couple hours so they aren't straight from the oven goo, but not solid either. Just perfect. Although, I dare you to wait that long to try one. 

Cooks Illustrated created these out of the idea that they would like to reinvent the box brownie into a homemade brownie. Kind of defeats the purpose but okay. They nailed it. They certainly remind you of the boxed brownie... but really, like a million times better. Yeah. A million.

Easy to make? Couldn't be easier. It is a matter of dumping things into a bowl and mixing with a whisk- no mixer required. A very simple brownie recipe.

Really, if you like brownies, you've got to make these. They are very good. I don't think I could possibly choose a favorite brownie recipe, but these have got to be one of the best. And trust me, I've made a lot of brownies...


I always line my pan with parchment paper to make removing and cutting easier.
You just pick the brownies right out of the pan once they've cooled completely.


Then you start by cutting in half and diving it into how many brownies you desire.
With this pan, I divide in half and then cut each half into thirds. After that I go lengthwise into fourths. 
Then I've got 2 dozen from a 9x13 pan.


Chewy Brownies
adapted from Cooks Illustrated
Print Recipe


  • 1/3cup Dutch-processed cocoa
  • 1 1/2teaspoons instant espresso (optional)
  • 1/2cup plus 2 tablespoons boiling water
  • 2ounces unsweetened chocolate, finely chopped 
  • 4tablespoons (1/2 stick) unsalted butter, melted
  • 1/2cup plus 2 tablespoons vegetable oil
  • 2large eggs
  • 2large egg yolks
  • 2teaspoons vanilla extract
  • 2 1/2cups (17 1/2 ounces) sugar
  • 1 3/4cups (8 3/4 ounces) unbleached all-purpose flour
  • 3/4teaspoon table salt
  • 6ounces bittersweet chocolate, cut into 1/2-inch pieces 
  1. 1. Adjust oven rack to lowest position and heat oven to 350 degrees. Make foil sling using the following steps: Cut 18-inch length foil and fold lengthwise to 8-inch width. Fit foil into length of 13 by 9-inch baking pan, pushing it into corners and up sides of pan; allow excess to overhang pan edges. Cut 14-inch length foil and fit into width of pan in the same manner, perpendicular to the first sheet (if using extra-wide foil, fold second sheet lengthwise to 12-inch width). Spray with nonstick cooking spray.
  2. 2. Whisk cocoa, espresso powder (if using), and boiling water together in large bowl until smooth. Add unsweetened chocolate and whisk until chocolate is melted. Whisk in melted butter and oil. (Mixture may look curdled.) Add eggs, yolks, and vanilla and continue to whisk until smooth and homogeneous. Whisk in sugar until fully incorporated. Add flour and salt and mix with rubber spatula until combined. Fold in bittersweet chocolate pieces.
  3. 3. Scrape batter into prepared pan and bake until toothpick inserted halfway between edge and center comes out with just a few moist crumbs attached, 30 to 35 minutes. Transfer pan to wire rack and cool 1½ hours.
  4. 4. Using foil overhang, lift brownies from pan. Return brownies to wire rack and let cool completely, about 1 hour. Cut into 2-inch squares and serve.

Monday, July 11, 2011

BBQ Chicken Kebabs


I really enjoy BBQ chicken, but for some reason I don't have it that often. Now that I've had these though, I am about ready to make it a regular staple on the menu. Not only was this meal fairly simple, it was incredibly delicious!


The sauce comes together rather quickly with very basic ingredients that combine to make a perfectly sweetened and spiced concoction. Between that and the spice rub... wow, this is a winner. 


Now, I will tell you, Cooks Illustrated does a great job keeping these kebabs moist with another one of their unusual techniques. Gosh, I love them. Anyways, first they salt the chicken cubes, which ensures moisture. THEN! They puree bacon to rub onto the cubes along with the spices. This protects the chicken with a layer of fat that isn't overwhelming, but does a superb job of keeping the chicken from drying out. An idea that would have never crossed my mind when grilling chicken, but one that works very verrrry well. Plus! It adds extra flavor.


What can I say? These are amazing. 


BBQ Chicken Kebabs
adapted from Cooks Illustrated
Print Recipe

Sauce
1/2 cup ketchup
1/4 cup light or mild molasses
2 Tb grated onion (using large holes of box grater)
2 Tb worcestershire sauce
2 Tb dijon mustard
2 Tb cider vinegar
1 Tb light brown sugar

Kebabs
2 lb boneless skinless chicken breast or thighs (cut into 1 inch cubes)
2 tsp kosher salt
2 Tb sweet paprika
4 tsp sugar
2 tsp smoked paprika (or chili powder if unavailable)
2 slices bacon
4 skewers

FOR THE SAUCE:
Bring all the ingredients to simmer in small saucepan over medium heat; cook, stirring occasionally until sauce reaches ketchup-like consistency and is reduced to about 1 cup, 5 to 7 minutes. Transfer 1/2 cup to small bowl and set aside remaining sauce to serve with cooked chicken.

FOR THE KEBABS:
Toss chicken and salt in large bowl; cover with plastic wrap and refrigerate for at least 30 minutes and up to 1 hour.

Turn grill to medium. While grill heats, pat chicken dry with paper towels. Combine sweet paprika, sugar and smoked paprika in small bowl. Process bacon in food processor until smooth paste forms, 30 to 45 seconds, scraping down bowl twice during processing. Add bacon paste and spice mixture to chicken; mix with hands or rubber spatula until all ingredients are thoroughly blended and chicken is completely coated. Thread meat onto skewers, rolling or folding meat as necessary to maintain 1" cubes.

Place kebabs on grill, turning one-quarter turn every 2 to 2 1/2 minutes until well browned and slightly charred, 8 minutes for breasts and 10 minutes for thighs. Brush top surface of kebabs with 1/4 cup sauce; flip and cook until sauce is brown in spots, about 1 minute. Brush second side with remaining 1/4 cup sauce; flip and continue to cook until brown in spots and instant read thermometer inserted in center of meat registers 160 degrees for breasts and 175 degrees for thighs, about 1 minute longer. Remove from grill and let rest 5 minutes. Serve, passing reserved BBQ sauce separately.

Saturday, July 9, 2011

This Weeks Delish: July 9, 2011

So, I have less than 2 weeks left in AL! I'll try and put up some good recipes to get you guys through 'till I am back on line after we get settled.  Until then, bare with me and my scatterbrain narrations.


  • I love yeast breads and these look so yummy! I've been wanting to try my hand at some Park House Rolls.
  • Believe it or not, I've never made chocolate chunk muffins either- I'll have to put that on my to do list as well.
  • Homemade popsicles are such a fun idea. I think when my daughter gets a little older, I'll have to invest in some. Until then, you guys should try out this recipe for apple pie a la mode popsicles!
  • Here is a nice fruit recipe for all of you that love to use things in season. Raspberry Crisp!
  • This Banana Cake looks incredible. I've been dying to make one every time I see past prime bananas... but I haven't quite gotten around to it yet.
This Weeks Pick:

Ohhhh, definitely going with the banana bread! The idea itself is just so clever. The technique is so inventive, I just love it. 


Friday, July 8, 2011

Ultimate Cream of Tomato Soup


Ever since I made homemade tomato soup for the first time, I haven't bought a can of the stuff since. There is no comparison. Absolutely none. The homemade stuff is SOOOO good! And I have tried many homemade recipes, a lot of them good. This one is the best.

Some are too liquidy or herby or are lacking in tomato flavor, just vaguely resembling tomato soup. Oh boy. Even the one's that are good are put too shame by this soup. It will now be the only tomato soup I make. It's perfect. Another Cooks Illustrated brain child. Jeez, I like them more and more with each recipe I get from them...

I love the idea of using flour as a thickener. It doesn't effect the taste but it adds to the consistency making it rich without having to add extra cream. I bet this soup would be delicious even without the cream, that's how good it is. I can't say enough about this soup. You MUST try this. Do it for yourself. I know that there are some extra steps involved (it is Cooks Illustrated after all) but it really makes a huge difference.


I served this with some Drop Biscuits- Yumm!

Ultimate Cream of Tomato Soup
adapted from Cooks Illustrated
Print Recipe


  • 2(28 ounce) cans whole tomatoes (not packed in puree), drained, 3 cups juice reserved, tomatoes seeded
  •       1 1/2tablespoons dark brown sugar
  • 4tablespoons unsalted butter
  • 4large shallots , minced
  • 1tablespoon tomato paste
  • Pinch ground allspice
  • 2tablespoons unbleached all-purpose flour
  • 1 3/4cups chicken stock or canned low-sodium chicken broth
  • 1/2cup heavy cream
  • 2tablespoons brandy or dry sherry
  • Table salt
  • Cayenne pepper


  1. Adjust oven rack to upper-middle position and heat oven to 450 degrees; line jelly-roll pan or rimmed cookie sheet with foil. Spread tomatoes in single layer on foil, and sprinkle evenly with brown sugar. Bake until all liquid has evaporated and tomatoes begin to color, about 30 minutes. Let tomatoes cool slightly, then peel them off foil; transfer to small bowl and set aside.
  2. Heat butter over medium heat in medium nonreactive saucepan until foaming; add shallots, tomato paste, and allspice. Reduce heat to low, cover, and cook, stirring occasionally, until shallots are softened, 7 to 10 minutes. Add flour and cook, stirring constantly, until thoroughly combined, about 30 seconds. Whisking constantly, gradually add chicken stock; stir in reserved tomato juice and roasted tomatoes. Cover, increase heat to medium, and bring to boil; reduce heat to low and simmer, stirring occasionally, to blend flavors, about 10 minutes.
  3. Strain mixture into medium bowl; rinse out saucepan. Transfer tomatoes and solids in strainer to blender; add 1 cup strained liquid and puree until smooth. Add remaining reserved liquid.
  4. Return the pureed mixture to the saucepan, add cream, and heat over low heat until hot, about 3 minutes. Off heat, stir in brandy or sherry; season to taste with salt and cayenne, and serve immediately.

Thursday, July 7, 2011

Flag Cake


I had SO much fun making 4th of July desserts! Last week I did an awesome layer cake that looked like a flag with each slice and this week I did a sheet cake that looked like a cake with berry adornments! Great fun and super easy! You don't even have to do any of the fancy piping around the edges like I did, I just wanted it to look super special, so I went for it.

I have a large 18 x 12 sheet pan that would have worked even better for this cake, but because I didn't want half a sheet cake leftover to take home, I opted for a smaller 13 x 9 cake. THE most important thing about making a sheet cake that you want to turn out of the pan, is to line the bottom with parchment paper. If you don't line the bottom with parchment, then you are running a very high risk of not being able to turn the cake out of the pan... now, if you are going to leave it in the pan and frost it that way, then don't worry, just grease the pan. I wanted to decorate the edges and border with piping though, so I turned it out of the pan.


To properly line the pan with parchment to turn out, you'll want to do a couple things. First cut out a piece of parchment paper just big enough to cover the bottom of the pan, not the sides. Now grease the whole thing with some butter or shortening. Place the parchment along the bottom. Flour just the sides of the pan. Then finally grease the parchment. Done. Not too bad right? If you grease and flour the parchment it's not a big deal, it's just not necessary for it to be floured so why do the extra step? That is not true for the sides though. No exception. Flour the sides.

The cake itself is fairly easy to put together. It utilizes the basic creaming method and alternate dry/wet add in at the end. It even has a little bit of almond extract for a little something different. If you're not a fan of almond extract just substitute an equivalent amount of vanilla extract. The cake turns out beautifully, nice and soft and flavorful. Moist and tender. Exactly like a cake should be. There is nothing worse than a dry piece of crumbly cake- yuck!

Oh and this cake uses a cream cheese frosting... hehehe SOOO good! Who doesn't love sweetened cream cheese? um, no one! If you are the one exception to that, then I recommend using this swiss buttercream frosting. It is also amazing. Again, if you want to, replace the almond extract with the vanilla. No big deal. And above all else- make sure your cream cheese and butter are at room temperature or else you will have lumpy frosting! To prevent this, I always cream my cream cheese first to smooth it out since it is more prone to lumping then butter. Once that is nice and smooth I add in the butter and smooth them both out to a creamy consistency then finally add the flavorings and sugar. I don't like my frosting too sweet so I added less than the recommended amount which is about 6 cups (1.5 lb). However, the confectioner's sugar is not only used for sweetness but for adding stability to the icing, therefore the less sugar you use, the more gloppy and less thick and spreadable it will be. I don't think I used more than 5 cups and my consistency was fine.


Flag Cake
adapted slightly from Ina Garten
Print Recipe


  • 3/4 pound (3 sticks) unsalted butter, at room temperature, plus more for greasing the pans
  • 2 cups sugar
  • 5 extra-large eggs, at room temperature
  • 1 1/2 teaspoons pure vanilla extract
  • 1 1/2 teaspoons pure almond extract
  • 3 cups all-purpose flour, plus more for dusting the pans
  • 1 teaspoon baking powder
  • 1/2 teaspoon baking soda
  • 1/2 teaspoon kosher salt
  • 1 cup milk
  • 3 blocks (24 oz) cream cheese, at room temperature
  • 3 sticks unsalted butter, at room temperature
  • 3/4 teaspoon pure vanilla extract
  • 3/4 teaspoon pure almond extract
  • 5 cups confectioners' sugar, sifted

Preheat the oven to 350 degrees F. Grease a 9x13 pan and line the bottom with a rectangular cut out of parchment paper. Flour the sides. Grease the parchment as well.
In the bowl of an electric mixer fitted with a paddle attachment, cream the butter and sugar on medium-high speed for 3 to 5 minutes, until light yellow and fluffy. Crack the eggs into a small bowl. With the mixer on medium speed, add the eggs 1 at a time, scraping down the bowl once during mixing. Add the vanilla and almond extracts and mix well. The mixture might look curdled; don't be concerned.
In a separate bowl, sift together the flour, baking powder, baking soda and salt. With the mixer on low speed, alternately add the dry ingredients and the milk to the batter in 3 parts, beginning and ending with dry ingredients. Mix until just combined. Fold in the 4 ounces of coconut with a rubber spatula.
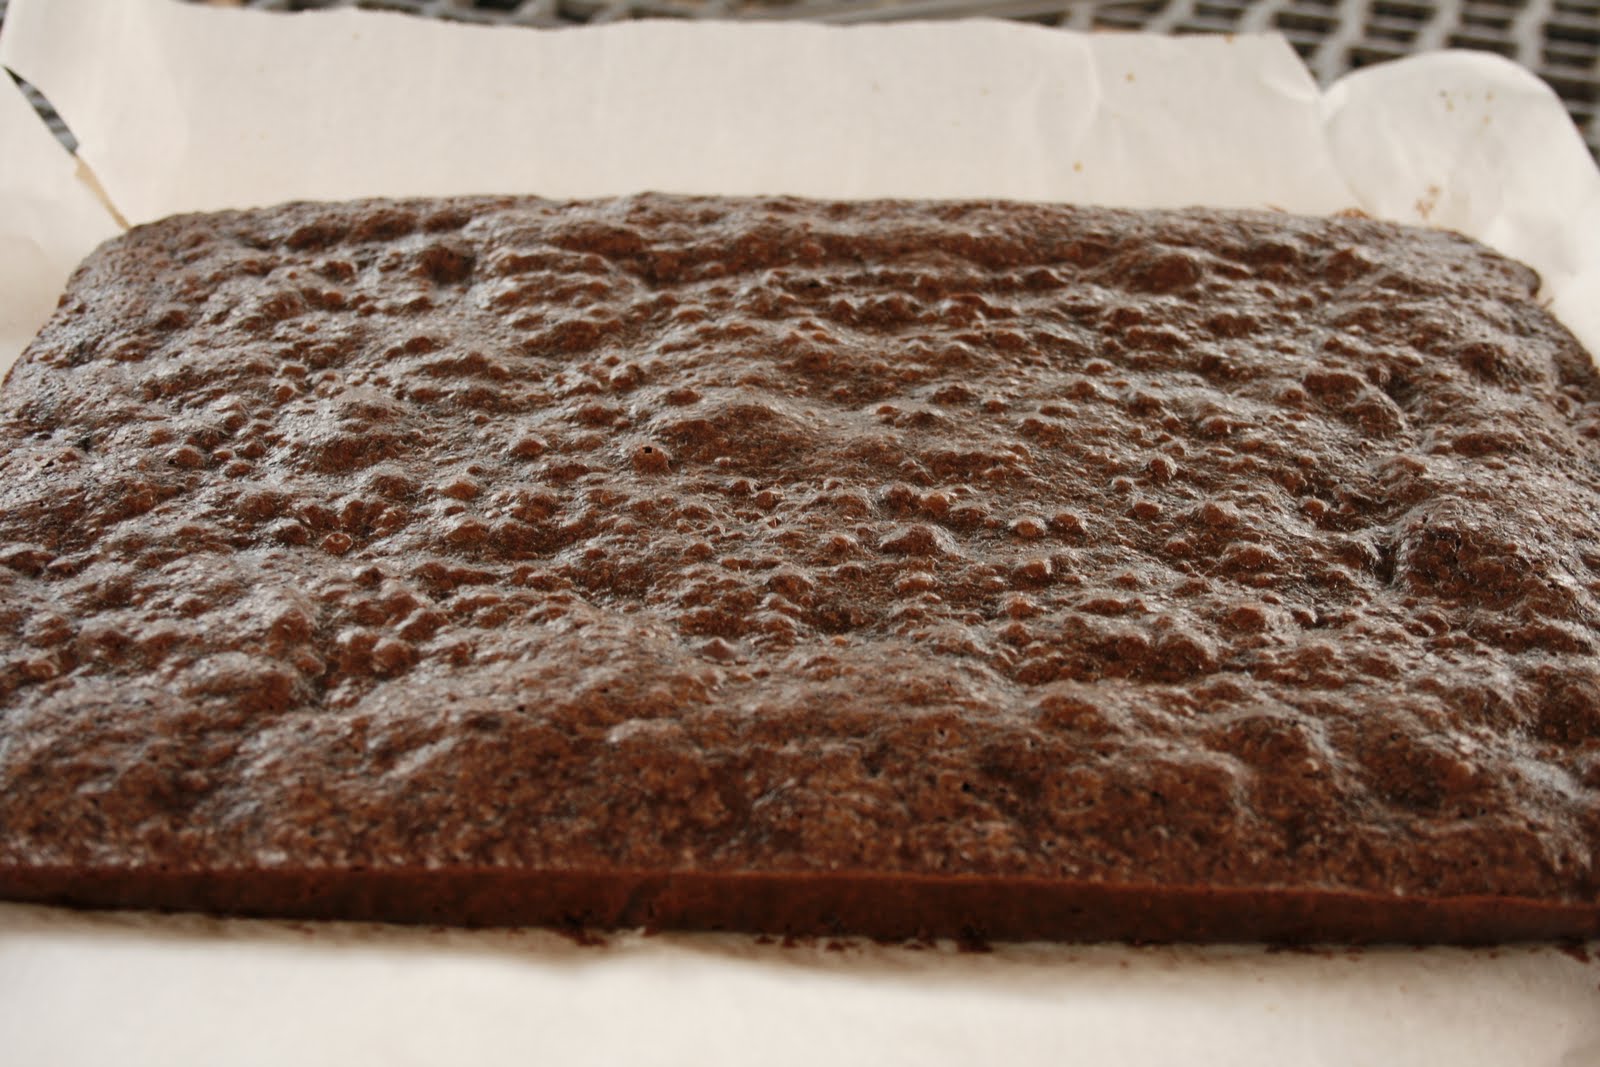
Pour the batter into the pan and smooth the top with a knife. Rap lightly on the counter to help remove any air bubbles. Bake in the center of the oven for 40 to 50 minutes, until the top is browned and a cake tester comes out clean. Cool on a baking rack for 30 minutes, then turn the cake out onto a baking rack to finish cooling.
For the frosting, in the bowl of an electric mixer fitted with a paddle attachment, combine the cream cheese, butter, vanilla and almond extract on low speed. Add the confectioners' sugar and mix until just smooth (don't whip!). Add more confectionary sugar if needed to reach desired level of sweetness.

Wednesday, July 6, 2011

Best Drop Biscuits


If you're too nervous about making traditional biscuits or even if you are pressed for time, drop biscuits are your solution. They are so quick and incredibly delicious! Anybody can make these. You don't have to be seasoned in the kitchen to do this. All it requires is basically mixing wet ingredients with dry. There is no cutting in of fat, like in traditional biscuits. 


Cooks Illustrated came up with an ingenious way to ensure the flakiness and moisture of these drop biscuits. Since the flakiness comes from cutting in the cold butter into the flour mixture they tried to mimic this. They poured melted butter into cold buttermilk and let the butter crystallize in the milk. If you have ever made something like pancakes, that requires melted butter to be combined with milk, this may have accidentally happened to you before because your milk wasn't room temperature, it was too cold and so it chilled the butter into crystals. haha I've done that a few times with pancakes so I would know. Anyways, it's very, very clever.


These biscuits are also versatile to your tastes. I threw in some chopped chives just to give them some extra flavor. I would also suggests maybe some grated cheddar or whatever cheese you like. Any other herbs work well too. This is a great drop biscuit recipe, seriously. Super moist, very delicious.


Best Drop Biscuits
adapted from Cooks Illustrated


  • 2cups unbleached all-purpose flour (10 ounces)
  • 2teaspoons baking powder
  • 1/2teaspoon baking soda
  • 1teaspoon sugar
  • 3/4teaspoon table salt
  • 1cup buttermilk (cold)
  • 8tablespoons unsalted butter , melted and cooled slightly (about 5 minutes), plus 2 tablespoons melted butter for brushing biscuits
  1. Adjust oven rack to middle position and heat oven to 475 degrees. Whisk flour, baking powder, baking soda, sugar, and salt in large bowl. Combine buttermilk and 8 tablespoons melted butter in medium bowl, stirring until butter forms small clumps (see photo below).
  2. Add buttermilk mixture to dry ingredients and stir with rubber spatula until just incorporated and batter pulls away from sides of bowl. Using greased 1/4-cup dry measure, scoop level amount of batter and drop onto parchment-lined rimmed baking sheet (biscuits should measure about 2 1/4 inches in diameter and 1 1/4 inches high). Repeat with remaining batter, spacing biscuits about 1 1/2 inches apart. Bake until tops are golden brown and crisp, 12 to 14 minutes.
  3. Brush biscuit tops with remaining 2 tablespoons melted butter. Transfer to wire rack and let cool 5 minutes before serving.